

Key takeaways
-
Cast Swap keeps your original shot and background, and replaces only the person on screen while preserving their timing and expressions.
-
Scene Swap keeps your performance and camera feel, and rebuilds both the character and the environment from a reference image.
-
The driver video is your anchor; the clearer the performance and framing, the more natural the result.
-
Scene Swap works best when you respect the first-frame alignment step, because that frame locks composition and continuity for the whole shot.
Anyone who has spent time around shoots knows this feeling. The performance finally lands, everyone relaxes for a moment, and then someone says, “What if we changed the person” or “This would be better in a different setting.” On paper those are small requests, but in production they usually mean another day, more money, and a new round of risk.
Most reshoots are not about fixing a bad idea. They are about shifting some variable that has nothing to do with the acting. The spokesperson changes. The location falls through. Legal flags something in the background. A client decides the same script should now feel like a different world, while keeping the same impact.
Performances in invideo
Performances in invideo is designed for exactly that moment. It treats your existing performance as the thing you protect, and lets you change who appears on screen and where they appear, without going back to set. It does this through two workflows inside invideo: Cast Swap and Scene Swap.
Let’s unpack what these workflows actually do, when to use each one, and how to run them step by step so they behave like a real extension of your production process.
Why reshoots are hard
From outside the process, a reshoot sounds like pointing a camera at the same thing again. Inside the process, it means reassembling a miniature world that probably should have stayed packed away.
When you plan a reshoot, you are juggling several points at once.
- – You need talent availability, which rarely lines up neatly with your original schedule.
- – You need continuity across wardrobe, hair, makeup, lighting, and camera position.
- – You need alignment from stakeholders who now see this as a chance to reopen other decisions.
Even small changes carry hidden costs. Swapping one actor for another means new contracts and direction. Moving the same performance into a new location means gestures, eye-lines, blocking, and lighting must all work again. Every extra day between “we need a change” and “we have a new version” is a day where the idea can lose momentum.
That is why a strong take feels precious. It holds timing, micro-expressions, rhythm, and a certain honesty that is difficult to reproduce on command. Most tools can give you something visually impressive. Very few respect that original performance as the thing you should not waste.
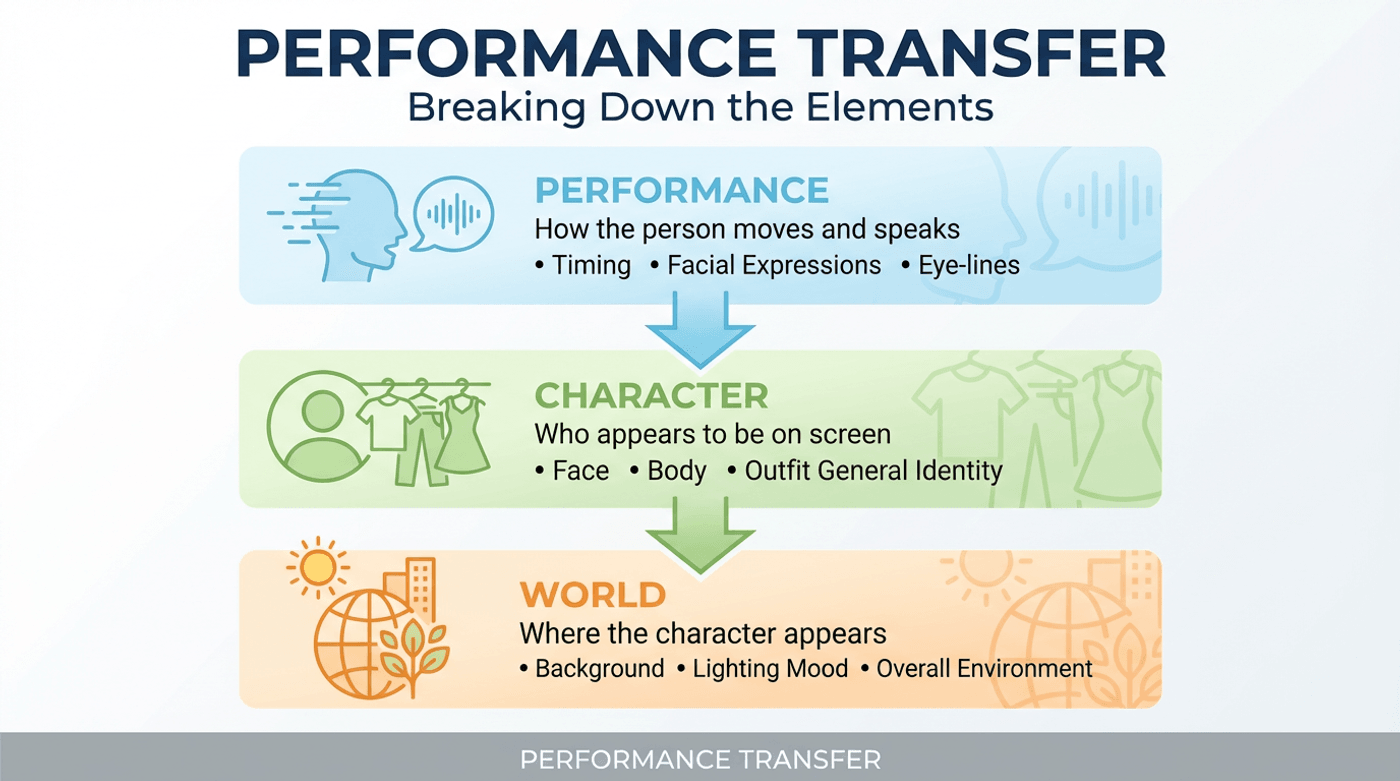
What performance transfer means
It helps to break the problem into three simple pieces.
- – Performance is how the person moves and speaks. It includes timing, facial expressions, eye-lines, and lip sync.
- – Character is who appears to be on screen. That includes face, body, outfit, and general identity.
- – World is where the character appears. This covers background, room, set, lighting mood, and overall environment.
What performance transfer means?
Performances in invideo uses a driver video to capture performance and camera language. The driver video donates motion, timing, eye-lines, and framing. On top of that, you decide how much of the visible image you want to keep, and how much you want to swap.
- – With Cast Swap, you keep the original world and swap the character.
- – With Scene Swap, you keep the original performance but rebuild the character and world from a reference image that matches your camera composition.
Once you see it in those terms, the decisions become clearer. If the room is fine but the person needs to change, that is a cast problem. If the acting is right but the world feels small or off-brand, that is a scene problem.
What Performances does
Performances in invideo gives you a practical way to treat your best take as a reusable asset, instead of a one-time event you must recreate every time something shifts.
For many teams, that unlocks a few important possibilities.
- – You can capture a good performance once, in a simple environment, and later restage it into more considered worlds that match your brand.
- – You can generate casting and localization variants without hoping every actor hits the same timing and energy.
- – You can answer late-stage feedback that usually triggers a reshoot, with a workflow that lives inside post instead.
The important part is that you are no longer forced into an all-or-nothing choice between living with the original or starting from scratch. You can separate performance from look, and work on each layer at the right moment.
What is Cast Swap?
Cast Swap is for moments when the shot works, but the person on screen needs to change.
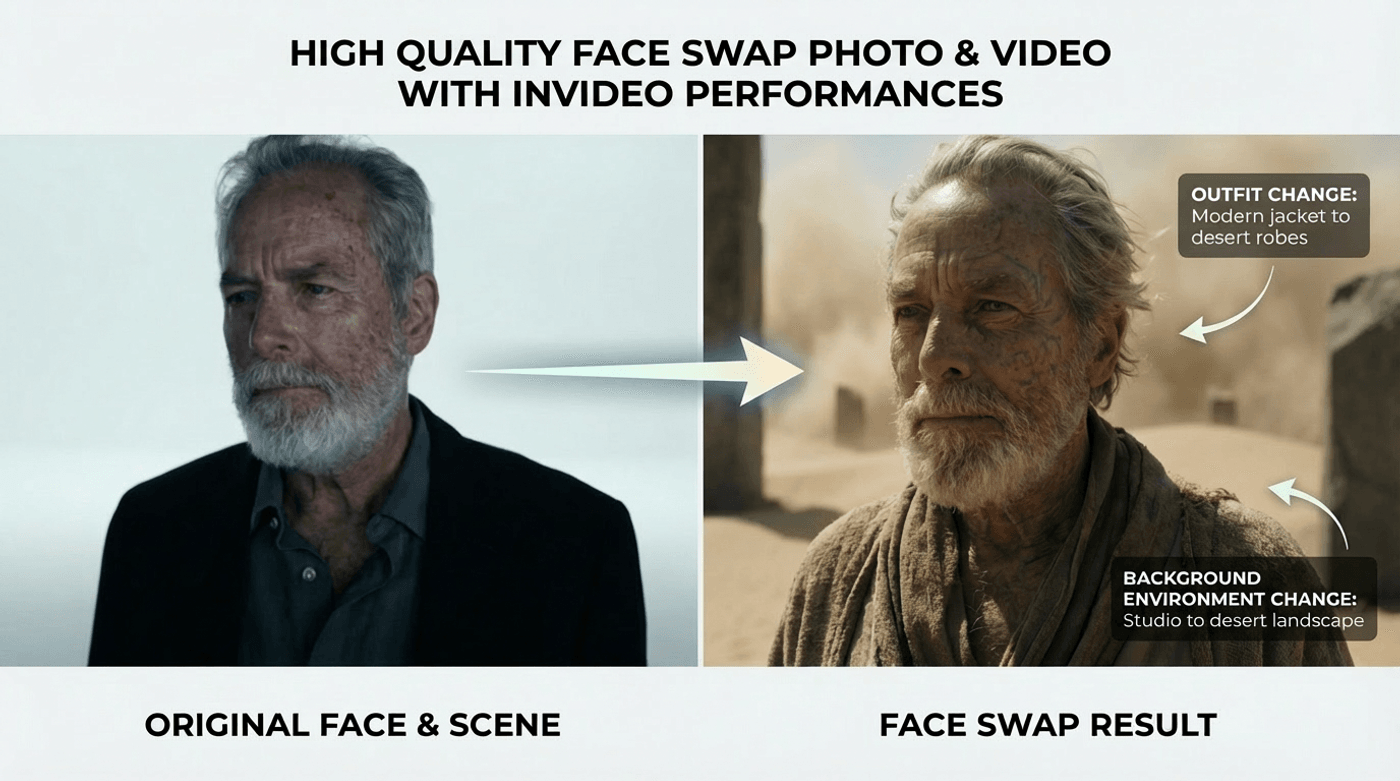
High quality face swap for both photos & videos
In practical terms, you might use Cast Swap when:
- – A brand decides they want a different spokesperson, but love the existing take and background.
- – You have a creator-style ad that performs well, and you want to produce more versions with different identities for different audiences.
- – You want a privacy-safe variation where the delivery stays human, but the visible face belongs to an approved synthetic or alternative character.
In all of these cases, the world does not need fixing. The frame already tells the right story. You just want somebody else delivering that story inside the same space.
Cast Swap needs two ingredients in invideo:
- – A driver video, which is your original performance with its timing, gestures, and framing.
- – A character image, which is a clear image of the person you want to appear in that shot.
The output is a new video where:
- – The background and camera work match the original driver video.
- – The character now looks like the person in your character image.
- – The performance follows the original timing and expressions from the driver video.
How to use Cast Swap in invideo
To run Cast Swap in invideo, you can follow a simple sequence.
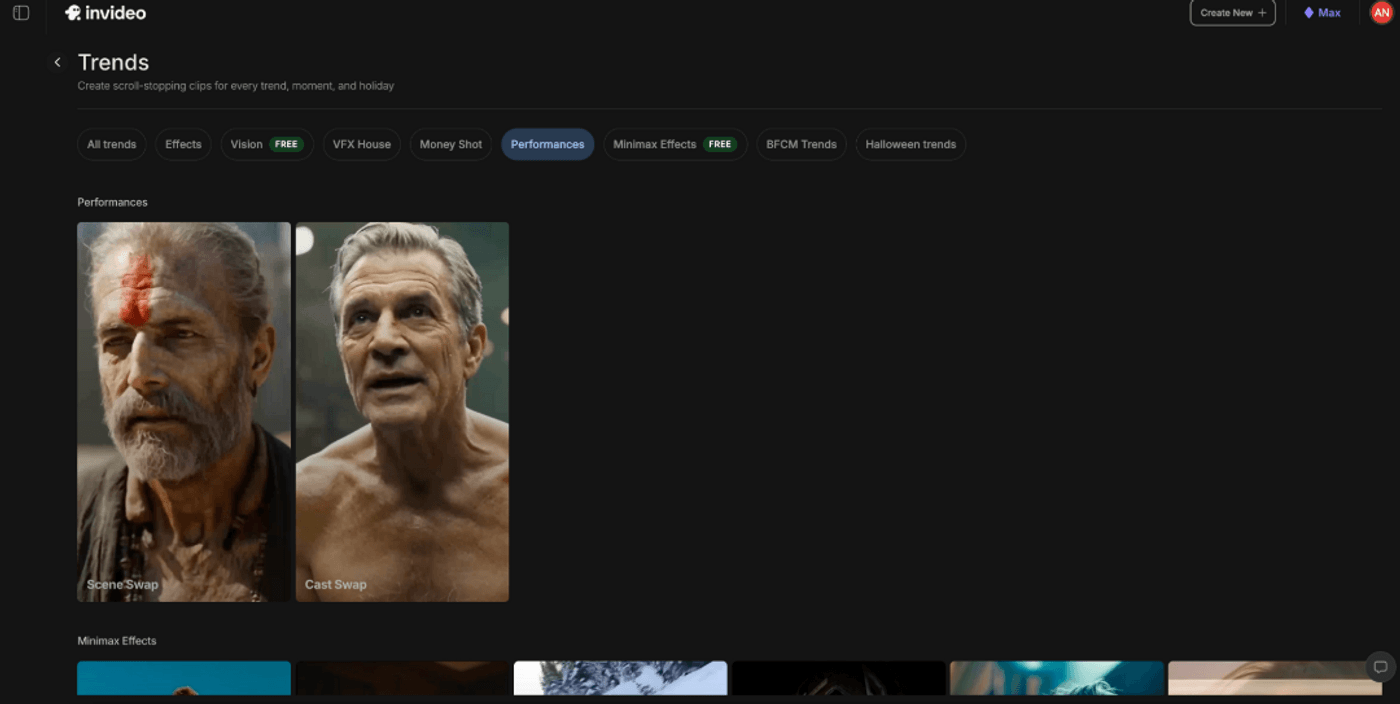
1. Go to Agents & Models, then open Trends.
2. Inside Trends, open Performances and choose Cast Swap.
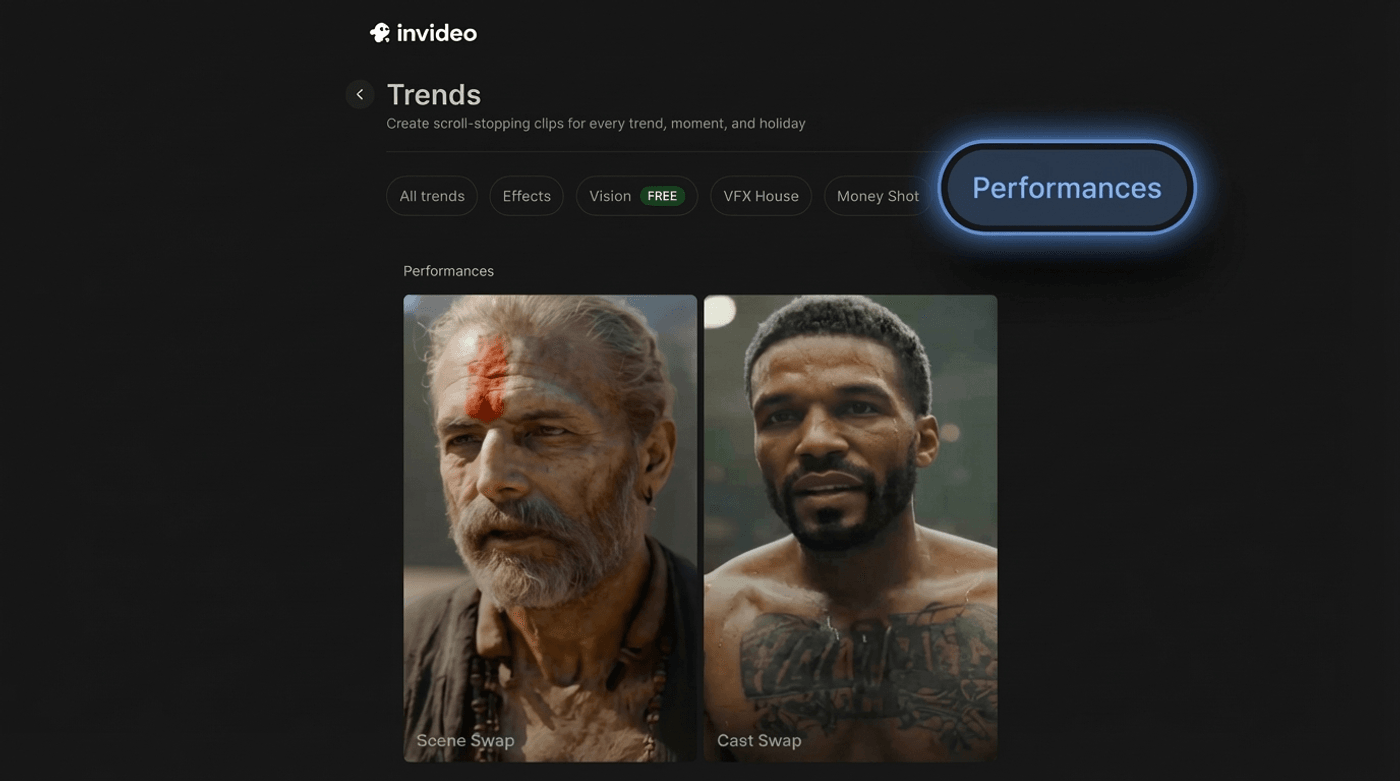
Invideo interface to create high quality face swap photo & videos
3. Upload your driver video, the clip whose performance you want to preserve.
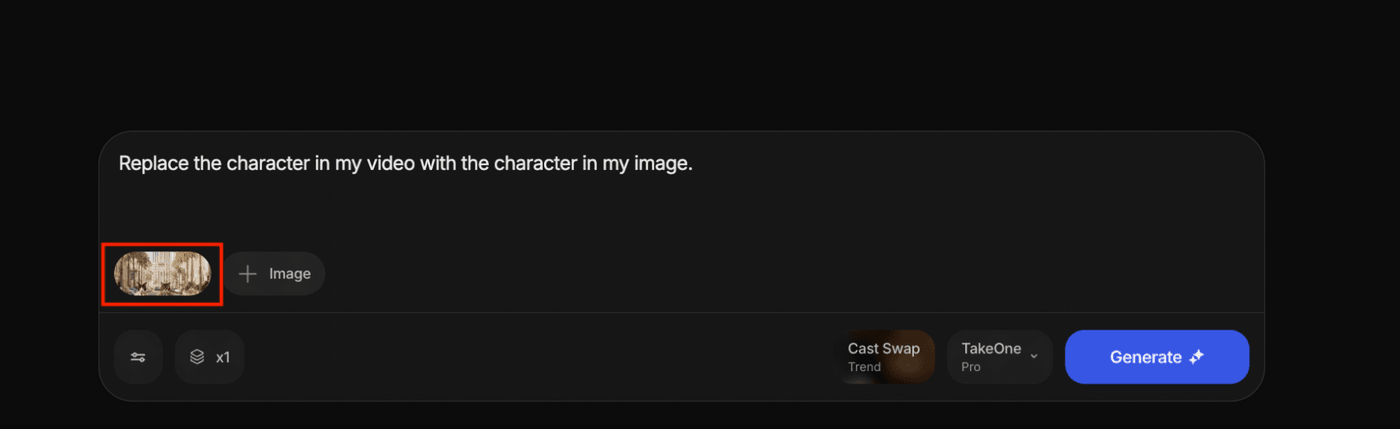
Performances Cast Swap screen with driver video upload panel.
4. Upload your character image, making sure it is a clear, well-lit view of the new person’s face.
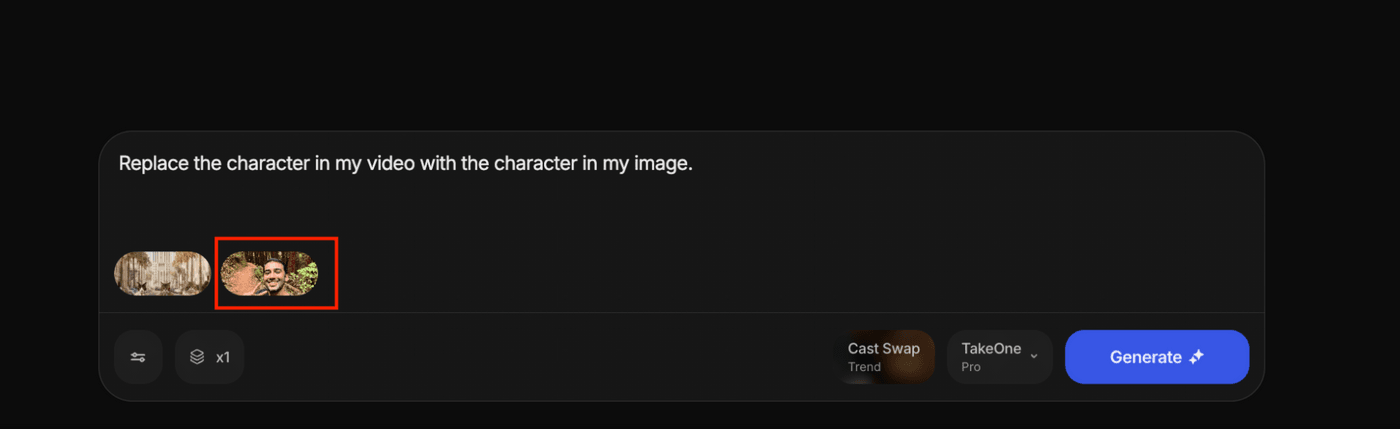
Performances Cast Swap screen with character image added.
5. Click Generate, review the result, and then Export when you are happy.
When you judge the result, it helps to watch it twice. First you watch it like a normal viewer and decide if it feels believable. Then you watch only the eyes and mouth and check whether they sit naturally inside the scene. If those details feel grounded, the shot usually holds up even under repeated viewing.
What is Scene Swap?
Scene Swap exists for the opposite situation. Here, the performance is good, but the world around it is not helping you.
Maybe you recorded a strong delivery on a laptop camera against a blank wall and now want it to feel like a modern studio. Perhaps you filmed in a small office but want the content to live inside a polished working environment. You might have a talking-to-camera piece that should move between different contexts for different campaigns.
Scene Swap lets you keep your original performance and camera rhythm, and use a reference image to define a new character and world. The tool then animates that image with the performance signals from your driver video.
Scene Swap combines performance from your driver video with composition from a carefully prepared reference.
You work with:
- – A driver video, which donates motion, timing, eye-lines, and framing.
- – A generated first-frame reference image, which defines the new character and environment while matching the driver video’s composition.
The output is a new video where:
- – The person and background come from your reference image.
- – The movement, expressions, and timing still feel like your original performance.
- – The shot behaves like the same take has been restaged in a different world.
Why the first frame matters in Scene Swap
When you restage a performance in traditional production, you spend time getting the camera back where it needs to be. You match height, distance to subject, lens choice, and pose. You do that because the audience feels it when those elements drift.
Scene Swap works the same way. The first frame of your driver video carries all the composition rules for that shot. If your reference image respects that frame, the resulting video feels coherent. If it ignores that frame, you end up with a performance trying to live inside a different geometry.
The first-frame step is there to bring your reference image into alignment with that original composition, so the system can move from a solid anchor rather than guessing.
How to use Scene Swap in invideo
Scene Swap has a slightly longer flow, because you are building that aligned reference inside the project.
1. Go to Agents & Models, then open Trends.
2. Inside Trends, open Performances and choose Scene Swap.
3. Upload your driver video, the clip whose performance you want to keep.
Performances Scene Swap screen with driver video uploaded.
4. Take a screenshot of the first frame of that driver video. This frame will act as your composition guide.
5. In the same project, open Nano Banana Pro.
6. In Nano Banana Pro, upload:
– the first-frame screenshot, and
– either a character image you want to transform into, or use a text prompt describing the character and background you want.
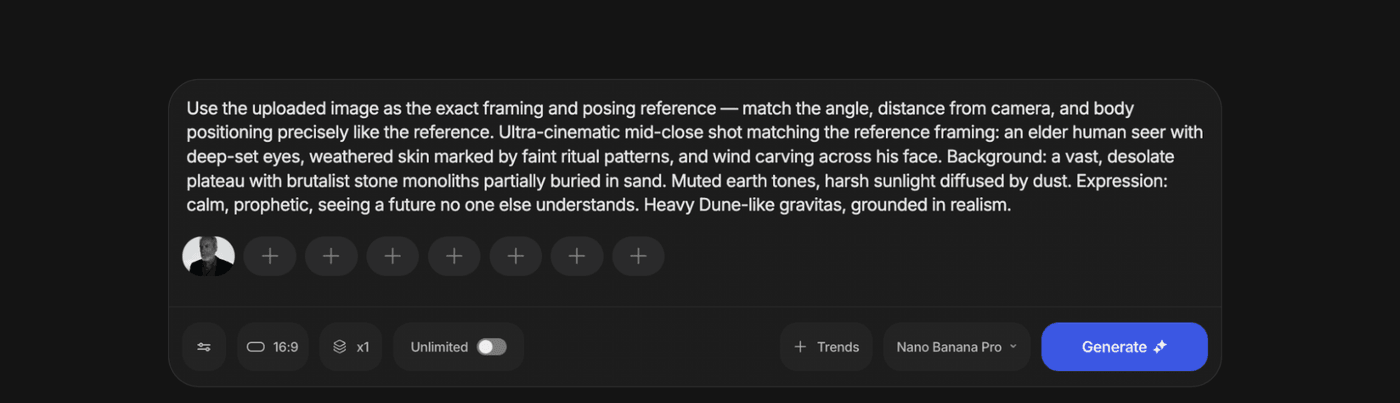
Nano Banana Pro view with first-frame screenshot and character image loaded
7. Use a prompt that clearly prioritizes matching the original frame.
8. Generate until the resulting image feels like the first frame of your original shot, but with the new person and world.
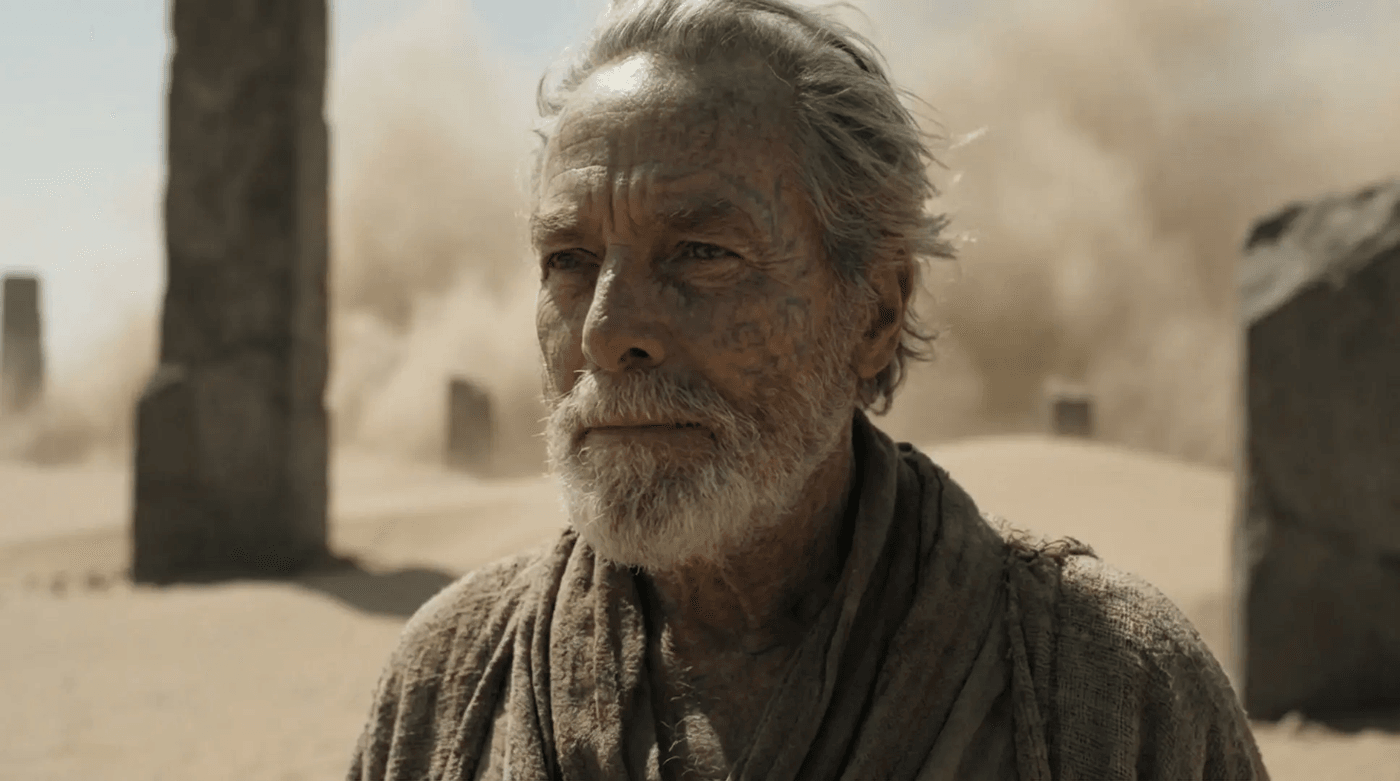
Aligned first-frame image matching pose and angle with a new character and world.
9. Return to Performances and stay inside Scene Swap.
10. Upload the driver video again, along with the newly generated first-frame image.
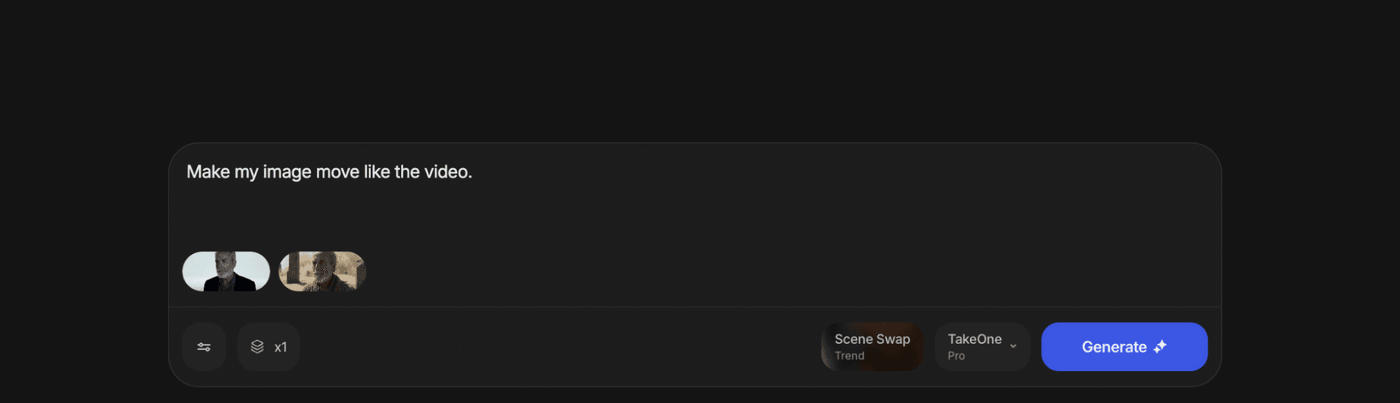
Performances Scene Swap with driver video and aligned reference image loaded.
11. Click Generate, review the scene, and then Export when it feels right.
When you watch the result, you can ask a simple question. If someone saw both versions side by side, would they believe they came from the same performance on different sets. If the answer feels like yes, your alignment and inputs are doing their job.
How to get better results
Like any production tool, Performances rewards care at the input stage. You do not need perfection, but a few practical choices make a big difference.
1. Treat the driver video with respect. A clear face, steady framing, and sensible lighting make it much easier to carry subtle performance into a new character or scene. If your first test uses a clip where the face is always turning away or is heavily blurred, the system has much less to work with.
2. Pick character images that tell a clean story. A straightforward, well-lit face with natural expression will usually translate better than a tiny, noisy crop or a heavily distorted pose. You are effectively casting from a still, so choose images that feel like real frames from a believable person in a believable space.
3. Be patient with the first-frame alignment for Scene Swap. If the pose, camera distance, and body angle are clearly matched, the rest of the shot often falls into place. If that first image cheats the angle or drifts from the driver video, the final animation can feel like it is fighting itself.
4. Take one short driver clip, run Cast Swap and Scene Swap on it, and learn how your material behaves. Once you have one success, scaling into longer clips and multiple variations becomes a straightforward extension of that first win.
Troubleshooting common issues
Even with good inputs, you will sometimes see results that feel slightly off. That is normal in any creative workflow, and the fixes usually live close to the source.
If the framing or pose feels wrong in a Scene Swap result, go back to Nano Banana Pro and generate a stricter first-frame image. Use language that insists on matching the exact pose and distance, and avoid overloading the prompt with too many stylistic demands at once.
If the face feels unstable or inconsistent in a Cast Swap output, improve both sides of the equation. Choose a driver clip where the face is visible and not constantly blocked, and a character image that shows the face clearly at a similar angle.
If the background feels noisy or distracting in a Scene Swap, simplify your reference environment before pushing for more complexity. A convincing, clean world will usually serve your performance better than an overly busy one.
The best mindset is the same one you apply in video editing. You make one change, see what moves, and keep nudging the inputs until the picture feels natural.
Changing who appears in a frame, and where they appear, carries responsibilities along with creative power. Only use faces and likenesses that you have the right to use, especially for commercial projects. When you create swapped or restaged content for ads, also check that your output follows the rules of the platforms where you plan to publish.
That care keeps both your brand and your collaborators protected, and aligns with how audiences increasingly expect synthetic media to be handled.
Reshoots will probably always exist, but they no longer need to be your only answer when something about a finished video feels wrong.
Also check out these related articles:
-
Nano Banana Pro vs Nano Banana: 9 Key Upgrades Creators Should Know
-
How to A/B Test Dozens of Product Ad Variations in a Single Afternoon Using invideo Money Shot
-
AI Prompting Techniques To Take Product Shots In Different Angles
- Discover the Best AI Video Generators for 2025
FAQs
-
1.
What is the difference between Cast Swap and Scene Swap?
Cast Swap keeps your original shot and background, and replaces only the person on screen. Scene Swap keeps your original performance and camera rhythm, but rebuilds both the character and the environment from a reference image.
-
2.
Do I need to reshoot to change the person in my video?
You do not need to reshoot if you have a usable driver video. Cast Swap is specifically built to let you change who appears on screen while preserving the timing and expressions of the original performance.
-
3.
What kind of driver video works best for Performances?
A driver video with clear face visibility, steady framing, and sensible lighting tends to work best. Shorter clips are helpful for early tests because they let you see results quickly and adjust your inputs before committing to longer sequences.
-
4.
Why does Scene Swap need a first-frame screenshot?
Scene Swap uses the first frame of your driver video as a composition guide. That screenshot captures camera angle, distance, and pose, and your reference image is aligned to it so the rebuilt scene feels like the same shot rather than a different setup.
-
5.
Does Performances keep lip sync and expressions from my original clip?
Performances uses the driver video as the source of performance signals, including lip movements, expressions, and overall timing. The clearer those cues are in the driver video, the more convincingly they tend to carry into the swap.
-
6.
Can I use this for ads and UGC style variations?
You can. Many teams use Cast Swap to create multiple UGC creator-style versions of the same script, and Scene Swap to restage a single strong performance into different environments that match specific products, audiences, or platforms.
-
7.
Best apps for realistic video face swap on mobile?
For realistic results rather than just novelty, invideo’s Performances workflow is one of the strongest options, and it is accessible from mobile as well as desktop. You can capture on your phone, then use invideo to do high-quality performance-based swaps that hold up for real campaigns.
-
8.
Which face swap tools give the most realistic results?
Tools that do full performance transfer, not just sticker-style overlays, usually look the most believable. Enterprise-grade platforms like invideo, which track timing, expressions, and lip sync from a driver video, tend to produce far more “filmed” results than lightweight filter apps.
-
9.
How to improve face swap quality for moving faces?
Start with a clean driver video where the face is well lit, stays mostly in frame, and the camera movement is controlled. Then use an enterprise tool like invideo that can read and transfer that full performance, and match your character image as closely as possible in angle and lighting.
-
10.
Are there ethical guidelines for creating face swap videos?
Yes, and they start with consent: only use faces you have explicit, informed permission to use, and avoid swapping in real people without it. Be transparent by labeling or watermarking AI-generated content, and always stay within local laws and platform policies around likeness rights and synthetic media.